
Introduction
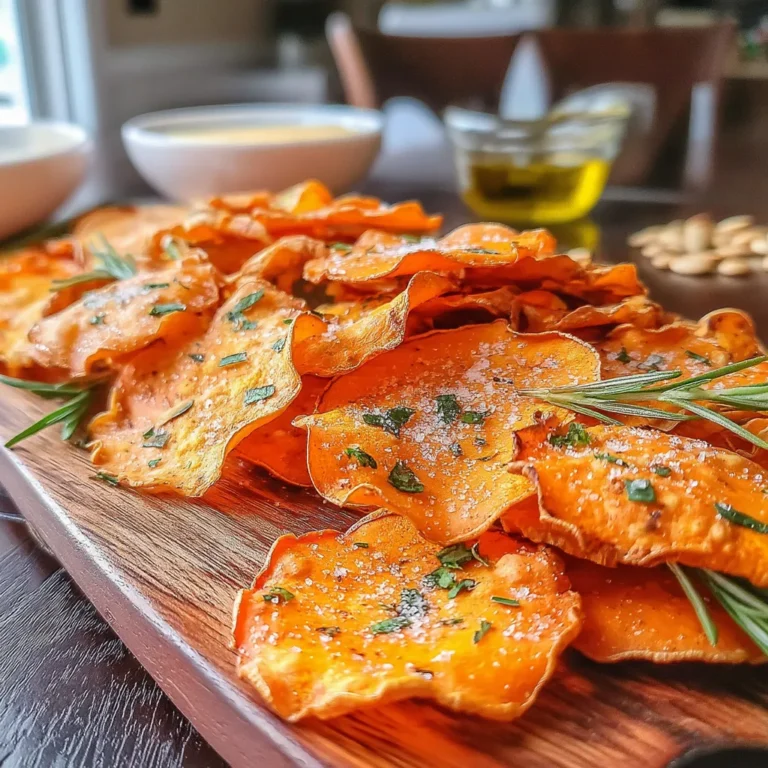
Healthy snacking is a wonderful way to satisfy cravings without compromising on nutrition. Instead of reaching for store-bought chips, why not try your hand at making homemade vegetable chips? This recipe for Crispy Herb-Infused Pumpkin Chips with Rosemary highlights the unique flavor and satisfying crunch of pumpkin, making it an ideal choice for those looking to indulge guilt-free.
Pumpkin is not just for pies and lattes; it’s a versatile ingredient that can be transformed into a delightful snack. With the growing trend of utilizing seasonal ingredients, pumpkins offer an array of nutritional benefits that make them perfect for a variety of recipes. This particular recipe is not only easy to prepare, but it also brings out the delicious flavor of herbs, making your snacking experience truly satisfying.
Recipe Overview
– Total Time: 45 minutes
– Servings: 4
– Difficulty: Easy
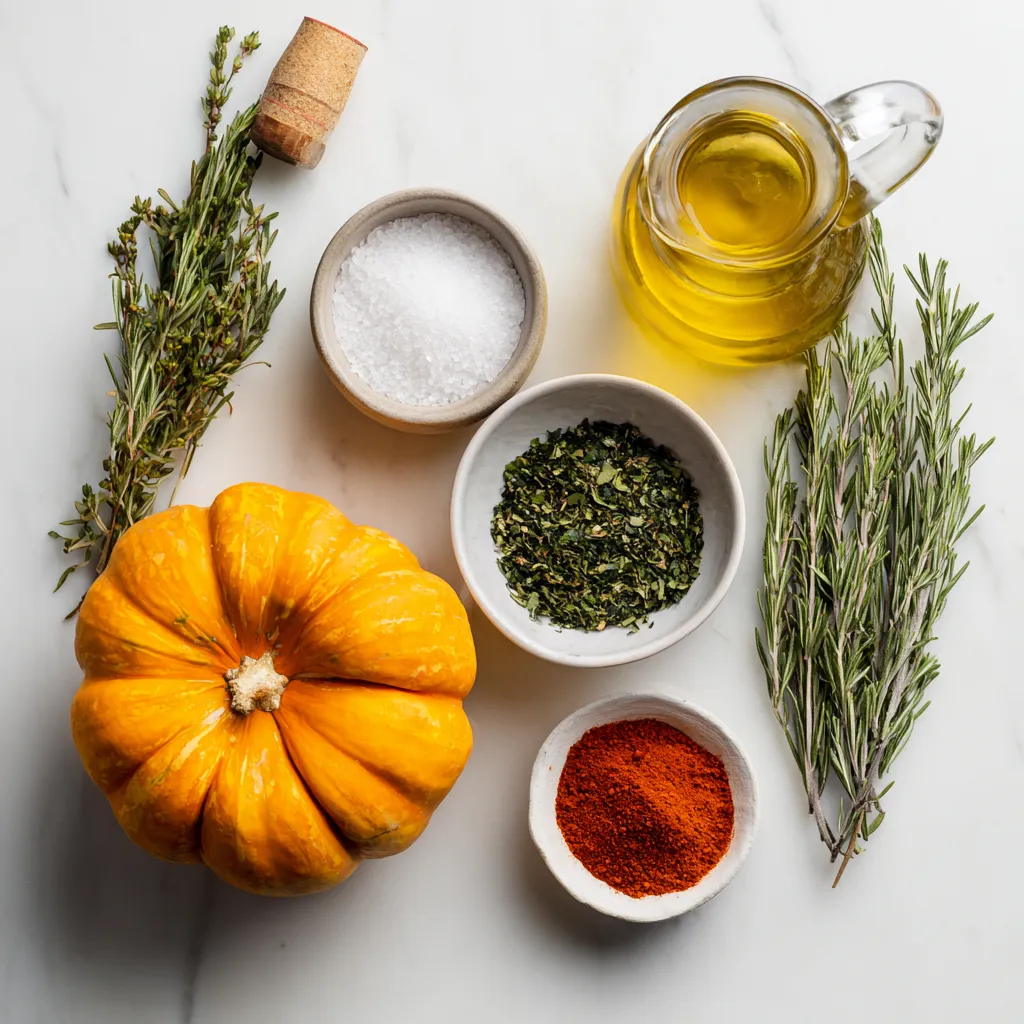
Ingredients
– 1 medium pumpkin
– 2 tablespoons olive oil
– 1 tablespoon fresh rosemary (or 1 teaspoon dried rosemary)
– 1 teaspoon sea salt
– 1/2 teaspoon garlic powder (optional)
– 1/2 teaspoon black pepper
– 1/2 teaspoon smoked paprika
Instructions
1. Preheat your oven to 350°F (175°C).
2. Carefully slice the pumpkin in half and scoop out the seeds and stringy insides.
3. Using a sharp knife or a mandoline slicer, cut the pumpkin into thin, even slices.
4. In a large bowl, combine the pumpkin slices with olive oil, rosemary, sea salt, garlic powder, black pepper, and smoked paprika. Toss until the pumpkin slices are evenly coated.
5. Lay the seasoned pumpkin slices in a single layer on a baking sheet lined with parchment paper.
6. Bake in the preheated oven for about 25-30 minutes, flipping halfway through, until the chips are golden brown and crispy.
7. Remove from the oven and let them cool slightly before serving.
The Appeal of Pumpkin Chips
Pumpkin is an excellent choice for snacking for several reasons:
– Nutritional benefits of pumpkin (rich in vitamins, low in calories)
– Comparison to traditional potato chips in terms of health
– The versatility of pumpkin in both sweet and savory dishes
Ingredients Breakdown
– Medium pumpkin: Selection tips and how to choose the best variety for chips
– Olive oil: Health benefits and alternatives
– Fresh vs. dried rosemary: Flavor profiles and usage
– Sea salt: Importance of seasoning and adjusting to taste
– Garlic powder: Optional flavor enhancer and its culinary uses
– Black pepper and smoked paprika: Adding depth and character to the chips
Step-by-Step Guide to Making Pumpkin Chips
Tips for Making the Perfect Crispy Herb-Infused Pumpkin Chips
Preparing the Pumpkin
To achieve the ideal crispiness for your pumpkin chips, it is crucial to focus on the slicing technique. Use a sharp knife or a mandoline slicer to create uniform slices, ideally about 1/8 inch thick. Thinner slices will yield a crunchier texture, while thicker slices may turn out chewy. Always cut away the skin, as this can become tough during baking. Selecting the right pumpkin variety, such as sugar pumpkin or pie pumpkin, can also enhance the flavor and texture of your chips.
Seasoning the Slices
Perfectly seasoned pumpkin chips are essential for balancing flavors. Start with a base of olive oil to help the herbs adhere to the slices. A blend of sea salt, freshly cracked black pepper, and finely chopped rosemary will elevate the taste. Consider adjusting the seasoning to your preference; for a more aromatic chip, add garlic powder or smoked paprika. It’s important to sprinkle the seasoning evenly to ensure every chip is flavorful.
Arranging on Baking Sheets
When it comes to baking, the arrangement of pumpkin slices on the baking sheet can greatly impact the final result. Make sure to space the slices out evenly, allowing for air circulation. Overlapping or crowding can lead to uneven cooking and soggy chips. Using parchment paper can also prevent sticking and make cleanup easier.
Air Drying in the Oven
Air drying the pumpkin slices in the oven, as opposed to frying, is key to achieving that crunchy texture. Set your oven to a low temperature, around 200°F (93°C), and allow the chips to dry slowly. This method removes moisture without burning, resulting in a delightful crunch. Keep an eye on the chips towards the end of the baking process, as they can turn from perfectly crispy to burnt quickly.
Cooling and Storing
Once the chips are done baking, allow them to cool completely on a wire rack. This step is vital for maintaining their crunchiness. After they’ve cooled, store the chips in an airtight container at room temperature. Proper storage prevents moisture from seeping in, ensuring your pumpkin chips stay fresh and crispy for days.
Flavor Variations and Customizations
Additional Herbs and Spices
Feel free to experiment with various herbs and spices to suit your taste. Thyme and oregano can add a Mediterranean flair, while nutritional yeast can introduce a cheesy flavor without dairy.
Alternative Oils
Switching up the oil can yield distinctive flavors. Avocado oil, known for its high smoke point and buttery taste, is a great alternative. Coconut oil can add a hint of sweetness and richness, perfect for those who enjoy tropical flavors.
Sweet Variations
For a dessert-style chip, consider sprinkling cinnamon and a touch of sugar on the pumpkin slices before baking. This sweet twist can make them a delightful treat, perfect for satisfying cravings for something sweet without the guilt.
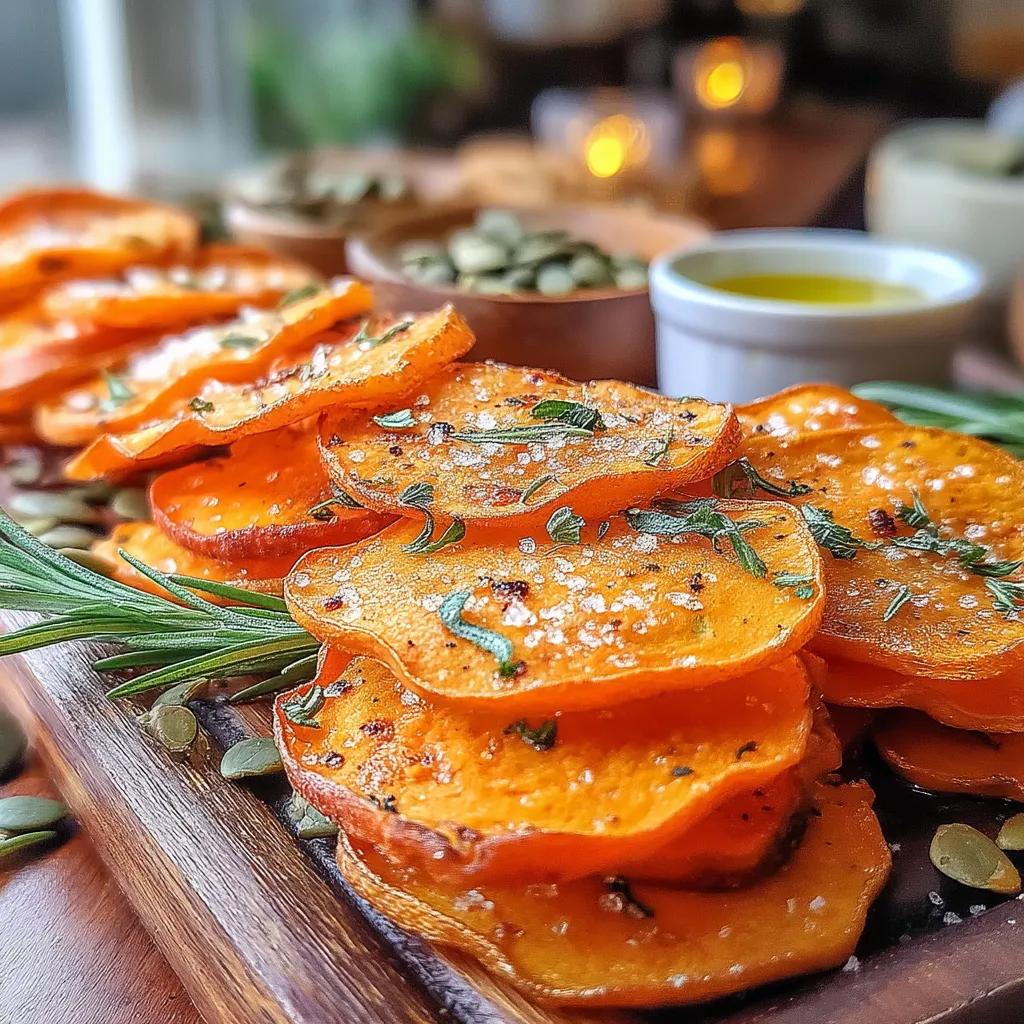
Serving Suggestions
Pairing with Dips
Crispy pumpkin chips are incredibly versatile and can be paired with a variety of dips. Creamy hummus, refreshing tzatziki, or zesty guacamole are excellent options that complement the herb-infused flavor of the chips.
Incorporating into Meals
These chips can also elevate your meals. Use them as a crunchy topping for salads or as a garnish for soups, adding a unique texture and flavor to your dishes.
Perfect for Parties or Gatherings
Serve these pumpkin chips at your next gathering as a unique snack option. Their vibrant color and delicious taste will impress your guests and provide a healthier alternative to traditional chips.
Conclusion
Making Crispy Herb-Infused Pumpkin Chips with Rosemary at home offers numerous benefits. Not only are they a healthier and more flavorful alternative to store-bought snacks, but they also allow you to celebrate the joy of cooking with fresh, seasonal ingredients. With the right techniques and creativity, you can easily whip up a batch of these delicious chips. We encourage you to try making them yourself and enjoy the satisfying crunch of homemade snacks.

Crispy Herb-Infused Pumpkin Chips with Rosemary
Ingredients
- 1.5 pounds medium-sized pumpkin
- 2 tablespoons olive oil
- 1 tablespoon fresh rosemary, finely chopped
- 1 teaspoon sea salt
- 0.5 teaspoon garlic powder
- 0.25 teaspoon black pepper
- 0.0 teaspoon paprika
Instructions
- Preheat your oven to 200°F (93°C). Line two baking sheets with parchment paper or silicone mats.
- Cut the pumpkin in half and scoop out the seeds and stringy bits. Slice the pumpkin into thin, even slices, about 0.125 inch thick.
- In a large mixing bowl, combine olive oil, chopped rosemary, sea salt, garlic powder, black pepper, and paprika. Mix well.
- Add the pumpkin slices to the bowl and toss until coated with the seasoning mixture.
- Spread the seasoned pumpkin slices in a single layer on the baking sheets without overlapping.
- Place the baking sheets in the oven and allow the pumpkin slices to air-dry for about 120 to 180 minutes, flipping halfway through.
- Keep an eye on them during the last hour to ensure they don’t burn. The chips should be crisp and lightly golden.
- Once dried, remove the chips from the oven and let them cool completely on a wire rack.
- Store the cooled chips in an airtight container at room temperature.