
Crunchy Honey Nut Trail Mix Recipe
Trail mix is one of those universally loved snacks that seamlessly fits into any lifestyle. Whether you’re hiking in the great outdoors, indulging in a midday pick-me-up at the office, or simply enjoying a cozy movie night at home, trail mix offers a delightful combination of flavor, texture, and nutrition. This versatile snack can be customized to suit your personal preferences, making it a staple for anyone seeking a quick and wholesome bite.
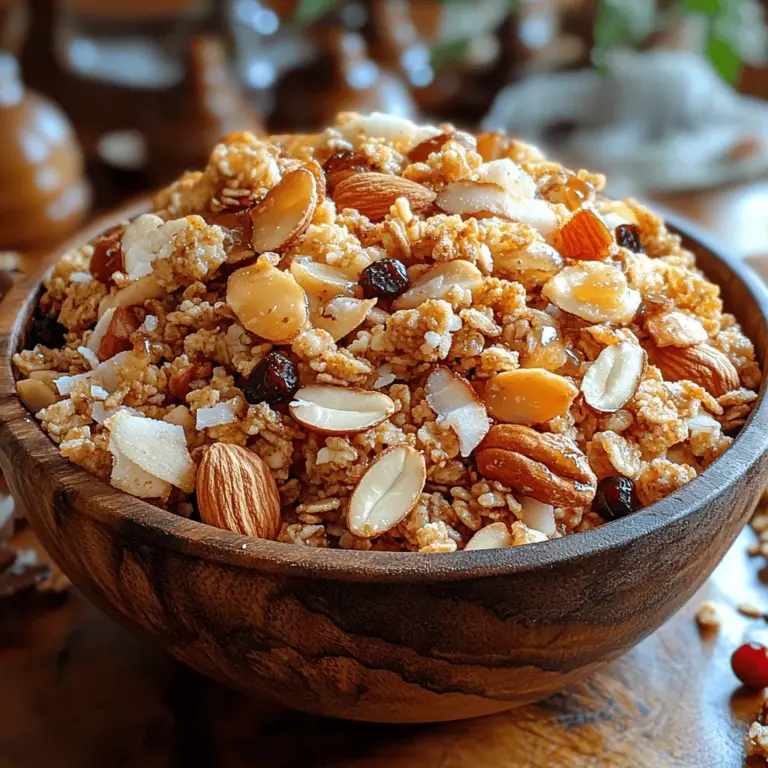
One standout recipe that embodies the best of trail mix is the Crunchy Honey Nut Trail Mix. This delightful blend not only satisfies your cravings but also packs a punch of health benefits thanks to its star ingredients—nuts and dried fruits. Nuts such as almonds, walnuts, and pecans are nutrient-dense, providing essential vitamins, minerals, and healthy fats. Combined with the natural sweetness of honey and the chewy texture of dried fruits, this trail mix creates a harmonious balance of flavors and textures that is sure to please any palate.
The ease of preparation is another reason why this trail mix is a favorite among snack enthusiasts. Unlike store-bought options that often contain preservatives and artificial ingredients, making your own trail mix at home allows you to control what goes into it. With just a few simple steps, you can create a delicious and nutritious snack that you can feel good about enjoying.
Understanding the Ingredients
Nuts and Their Nutritional Benefits
At the heart of any good trail mix are the nuts, which serve as the foundation of flavor and nutrition. Almonds, walnuts, and pecans are not only delicious but are also packed with health benefits. Almonds are an excellent source of vitamin E, magnesium, and fiber. They contribute to heart health and can help regulate blood sugar levels. Walnuts, known for their high omega-3 fatty acid content, are particularly beneficial for brain health and inflammation reduction. Pecans, on the other hand, are rich in antioxidants and healthy fats, making them a great addition to any diet.
Incorporating these nuts into your trail mix not only provides a satisfying crunch but also ensures that you’ll receive a good dose of protein and healthy fats. Both of these nutrients play a crucial role in sustaining energy levels, making this trail mix a perfect snack for those on the go.
The Sweet Elements
While nuts deliver a savory bite, the sweet components of the Crunchy Honey Nut Trail Mix elevate the overall flavor profile. Honey serves as a natural sweetener that not only adds sweetness but also offers various health benefits. It has antioxidant properties and can help with digestive issues, making it a better alternative to refined sugars.
Additionally, coconut oil plays a pivotal role in this recipe. Not only does it help to bind the ingredients together, but it also brings its own set of health benefits. Rich in medium-chain triglycerides (MCTs), coconut oil can provide a quick source of energy and may aid in weight management.
Textures and Crunch
Texture is an important aspect of any trail mix, and the Crunchy Honey Nut Trail Mix is no exception. The incorporation of crispy rice cereal and granola adds an essential crunch that complements the chewiness of the nuts and dried fruits. These ingredients work together to create a satisfying mouthfeel that keeps you coming back for more.
Coconut flakes are another optional addition that can enhance both flavor and texture. Their natural sweetness and chewy consistency can transform your trail mix into a tropical delight, making each handful an exciting experience.
Optional Additions
To further customize your trail mix, consider adding dried fruits and other optional ingredients. Dried cranberries and raisins are popular choices, both offering their own unique flavors and health benefits. Cranberries are known for their high antioxidant levels and may help support urinary tract health, while raisins provide natural sugars and additional fiber.
For those with a sweet tooth, mini chocolate chips can be a delightful addition. They add an indulgent touch to the mix while still allowing you to enjoy the health benefits of the other ingredients. The key is to find a balance that works for your taste preferences and nutritional goals.
Step-by-Step Preparation
Preheating the Oven
Before you dive into the preparation, it’s essential to preheat your oven. A temperature of 350°F (175°C) is ideal for achieving even baking. This temperature ensures that the nuts become perfectly toasted without burning, enhancing their flavor and crunch. Additionally, lining your baking sheet with parchment paper is a smart move. It not only prevents sticking but also makes cleanup a breeze, allowing you to focus on enjoying your homemade snack rather than worrying about post-cooking mess.
Creating the Nut Mixture
When it comes to combining your ingredients, technique is key. Start by measuring out your nuts and placing them in a large mixing bowl. Gently toss them together to ensure an even distribution of flavors. This step is important because it allows every bite of your trail mix to be equally delicious.
Next, you’ll want to incorporate your sweet elements—honey and coconut oil. Warm them slightly if needed, as this makes them easier to mix and helps them coat the nuts evenly. Drizzle the mixture over your nuts and use a spatula to fold the ingredients together gently. It’s crucial to avoid over-mixing, as this can cause the nuts to break apart and lose their desirable texture.
With the nuts and sweet elements combined, you’re well on your way to creating a delightful Crunchy Honey Nut Trail Mix that is sure to become a go-to snack in your household. Stay tuned for the subsequent steps that will guide you through the baking process and final assembly of this delicious blend.
{{image_2}}
Making the Sweet Binder
To create a perfectly balanced Crunchy Honey Nut Trail Mix, the sweet binder is crucial. This mixture not only enhances the flavor but also helps to hold the dry ingredients together, ensuring every bite is packed with sweetness and crunch.
Detailed Instructions on Creating the Honey Mixture
1. Gather Ingredients: For the sweet binder, you’ll need 1 cup of honey, 2 tablespoons of coconut oil, and a pinch of salt. If you want to add a bit of flavor, consider including 1 teaspoon of vanilla extract.
2. Combine Ingredients: In a small saucepan, combine the honey, coconut oil, and salt over low heat. Stir gently until the oil is fully melted and the mixture is well-combined.
3. Avoid Boiling: It’s essential to avoid bringing the mixture to a boil. Boiling can lead to a thicker consistency that hardens too quickly once cooled, resulting in a less forgiving texture in the final trail mix. Instead, just warm the ingredients enough to blend them thoroughly.
4. Add Flavorings: If you’re using vanilla extract, remove the saucepan from the heat and stir it in at this stage for an added depth of flavor.
Now that the sweet binder is ready, it’s time to combine it with the dry ingredients.
Combining and Baking
Tips for Ensuring Thorough Coating of Dry Ingredients with the Sweet Binder
1. Mix Dry Ingredients: In a large mixing bowl, combine your choice of nuts (such as almonds, cashews, and walnuts), seeds (like sunflower seeds and pumpkin seeds), and your favorite oats (use rolled oats for the best texture).
2. Pour the Binder: Drizzle the warm honey mixture over the dry ingredients in the bowl.
3. Toss Generously: Use a spatula or your hands to thoroughly coat the dry ingredients with the sweet binder. Make sure every piece is evenly covered, as this will ensure a delightful crunch in every bite.
Importance of Spreading the Mixture Evenly on the Baking Sheet
1. Prepare the Baking Sheet: Line a large baking sheet with parchment paper. This prevents sticking and makes cleanup a breeze.
2. Spread the Mixture: Pour the coated mixture onto the baking sheet and use a spatula to spread it out evenly. A uniform layer ensures that everything bakes evenly, which is crucial for achieving that perfect golden-brown color.
Baking Process
Discuss the Baking Time and the Importance of Stirring Halfway Through
1. Preheat Your Oven: Preheat your oven to 325°F (160°C).
2. Bake: Place the baking sheet in the oven and bake the trail mix for 15-20 minutes. It’s essential to stir the mixture halfway through the baking time to ensure even browning and to prevent any parts from burning.
Indicators of Perfect Doneness
– Color Check: The trail mix is done when it turns a lovely golden brown. Keep an eye on it toward the end of the baking time, as oven temperatures can vary.
– Texture Test: It should feel firm and crunchy to the touch. If it still seems soft, give it a few more minutes in the oven.
Cooling and Final Touches
Explain the Cooling Process and Why It Contributes to Crispness
Once the trail mix is baked to perfection, it’s crucial to let it cool completely on the baking sheet. This cooling process is vital for crispness. As the mixture cools, it hardens, creating that delightful crunch we all love.
1. Cooling Time: Allow the trail mix to cool for about 30 minutes. Avoid the temptation to taste it too soon, as the mix will be soft until it has cooled down.
Instructions for Adding Dried Fruits and Optional Chocolate Chips
After the trail mix has cooled, it’s time to customize it!
1. Add Dried Fruits: Mix in your favorite dried fruits, such as cranberries, raisins, or apricots.
2. Optional Chocolate Chips: For a treat, consider adding dark chocolate or yogurt-covered chocolate chips. Stir gently to combine, being careful not to break the nuts.
Storage and Serving Suggestions
Storage Tips for Freshness
To maintain the freshness of your Crunchy Honey Nut Trail Mix, follow these best practices:
1. Airtight Container: Store the trail mix in an airtight container to prevent moisture from getting in, which can lead to sogginess.
2. Cool, Dry Place: Keep the container in a cool, dry place away from direct sunlight.
Duration It Can Be Stored and Factors Affecting Its Shelf Life
– Shelf Life: When stored properly, this trail mix can last up to 2 weeks.
– Factors: The presence of dried fruits or chocolate can affect the shelf life, as they tend to absorb moisture or melt, respectively.
Serving Ideas
1. Portioning: For convenience, consider portioning the trail mix into small snack bags or jars. This makes it easy to grab on-the-go or pack for lunch.
2. Presentation for Gatherings: Serve the trail mix in a beautiful bowl at gatherings or parties, allowing guests to enjoy it as a healthy snack alternative.
3. Pairing Suggestions: Pair the trail mix with yogurt or sprinkle it over oatmeal for added texture and flavor.
Nutritional Information
Overview of the Nutritional Benefits Per Serving
Homemade Crunchy Honey Nut Trail Mix not only satisfies hunger but also offers several nutritional benefits.
1. Calories: A typical serving of trail mix (about 1/4 cup) contains approximately 150-200 calories, depending on the specific nuts and additions you choose.
2. Protein: Packed with nuts and seeds, each serving provides a good source of protein, making it a great snack for energy.
3. Essential Nutrients: This trail mix is rich in healthy fats, vitamins, and minerals, which contribute to overall health and wellness.
Discussion on Calories, Protein, and Essential Nutrients in the Trail Mix
– Healthy Fats: Nuts are an excellent source of heart-healthy monounsaturated fats, which can help reduce bad cholesterol levels.
– Fiber: The oats and fruits add fiber, promoting digestive health and keeping you full longer.
Comparison with Store-Bought Alternatives
Homemade trail mix offers more control over ingredients and eliminates the added sugars and preservatives often found in store-bought versions. By preparing it yourself, you can customize it to suit your taste preferences and dietary needs, ensuring a healthier snack option.
Conclusion
Making your own Crunchy Honey Nut Trail Mix at home is not only simple but also incredibly rewarding. This recipe allows you to enjoy a deliciously healthy snack that is versatile and customizable. By using wholesome ingredients, you can create a trail mix that suits your taste while providing essential nutrients.
Embrace the joy of healthy snacking with this easy recipe, and don’t hesitate to experiment with different nuts, seeds, and dried fruits to create your perfect blend. Whether you’re preparing it for a busy week of snacks or a gathering with friends and family, your homemade trail mix will surely impress. Enjoy the process and the delightful crunch of your very own creation!
