Peanut Butter Crunch Bliss Bars Recipe
Introduction
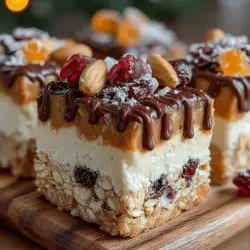
Peanut Butter Crunch Bliss Bars are a delightful treat that combines the rich, creamy taste of peanut butter with the satisfying crunch of oats and crispy rice cereal. These bars are not only a delicious snack option but also a versatile dessert that can be enjoyed any time of the day. Whether you’re looking for a quick pick-me-up between meals or a sweet indulgence after dinner, these bliss bars are sure to satisfy your cravings without derailing your healthy eating habits.
One of the standout features of this recipe is its health benefits. Peanut butter, a key ingredient, is packed with protein, healthy fats, and essential vitamins and minerals. When paired with whole grain oats, these bars provide a hearty dose of fiber, which is crucial for digestive health. The use of natural sweeteners like honey or maple syrup helps to minimize refined sugar intake while still delivering a satisfying sweetness. With these nutritional advantages, Peanut Butter Crunch Bliss Bars are more than just a treat; they can be a part of a balanced diet.
The Allure of Peanut Butter Crunch Bliss Bars
The popularity of no-bake recipes has surged in recent years, and it’s easy to see why. These recipes save time and energy, allowing you to create delicious treats without the need for an oven. Peanut Butter Crunch Bliss Bars exemplify this trend, offering a simple preparation method that requires minimal cooking time. You can whip up a batch in under 30 minutes, making them an ideal solution for busy individuals and families.
What truly sets these bars apart is their harmonious blend of flavors and textures. The creaminess of peanut butter is perfectly complemented by the crunch of oats and crispy rice cereal, while the optional additions like chocolate chips or dried cranberries introduce a hint of sweetness and chewiness. The result is a balanced snack that delights the senses and satisfies your hunger.
Ingredients Breakdown
To create these blissful bars, you’ll need a selection of wholesome ingredients that contribute not only to their flavor but also to their nutritional profile. Let’s delve into each component:
– Creamy Peanut Butter: The star ingredient, creamy peanut butter is not only delicious but also offers a rich source of protein, which is essential for muscle repair and growth. It is also high in healthy monounsaturated fats, which can support heart health. Choose a natural peanut butter with minimal additives for the best flavor and health benefits.
– Honey or Maple Syrup: These natural sweeteners serve as a healthier alternative to refined sugars. Honey contains antioxidants and has been linked to various health benefits, including improved digestive health. Maple syrup, on the other hand, is rich in minerals like manganese and zinc. Both options provide a lovely sweetness that complements the nutty flavor of peanut butter.
– Pure Vanilla Extract: A few drops of pure vanilla extract can enhance the overall flavor profile of the bars. It adds depth and aroma, elevating the taste of the other ingredients. Opt for pure vanilla over synthetic options to ensure a quality flavor.
– Rolled Oats: A staple in many healthy recipes, rolled oats are an excellent source of whole grains and fiber, which can help keep you feeling full and satisfied. They also contribute a chewy texture to the bars, making each bite enjoyable.
– Crispy Rice Cereal: This ingredient adds a delightful crunch and lightness to the bars. It helps to create that satisfying contrast in texture that makes these bars so appealing. Look for a low-sugar variety to keep the bars healthy.
– Dried Cranberries or Chocolate Chips (Optional): For those who want to add a little extra flavor, dried cranberries or chocolate chips make great additions. Dried cranberries provide a tartness that contrasts nicely with the sweetness, while chocolate chips add indulgence.
– Salt: A pinch of salt is crucial for balancing the sweetness of the bars. It enhances the overall flavor and brings out the richness of the peanut butter.
– Chopped Nuts: If you’re looking for additional texture and healthy fats, consider adding chopped nuts such as almonds or walnuts. They can elevate the nutritional value and add a satisfying crunch.
– Dark Chocolate: Finally, a drizzle of melted dark chocolate can serve as the finishing touch, making these bars truly indulgent. Dark chocolate is not only delicious but also packed with antioxidants, further enhancing the health benefits of your treat.
Step-by-Step Instructions
Creating Peanut Butter Crunch Bliss Bars is straightforward and requires minimal effort. Follow these step-by-step instructions to make your own batch:
1. Prepare Your Baking Dish: Begin by lining an 8×8 inch baking dish with parchment paper. This will prevent the bars from sticking and make for easy removal once they are set.
2. Mix the Wet Ingredients: In a large mixing bowl, combine the creamy peanut butter, honey or maple syrup, and pure vanilla extract. Use a spatula to mix everything until smooth and well combined.
3. Combine the Dry Ingredients: In a separate bowl, mix together the rolled oats, crispy rice cereal, and a pinch of salt. If you’re adding chopped nuts or dried cranberries, include them in this mixture.
4. Combine Wet and Dry Mixtures: Gradually fold the dry ingredients into the wet mixture. Stir until everything is evenly coated and the mixture is thick but manageable.
5. Press into the Baking Dish: Transfer the mixture into the prepared baking dish. Use a spatula to press it down firmly and evenly. The more compact the mixture, the better the bars will hold together once set.
6. Chill: Place the baking dish in the refrigerator for at least 30 minutes to allow the bars to firm up. If you’re adding melted dark chocolate on top, you can do this step before chilling.
7. Slice and Serve: Once the bars have set, remove them from the baking dish using the parchment paper. Slice them into squares or rectangles, depending on your preference.
With these simple steps, you will have created a batch of Peanut Butter Crunch Bliss Bars that are not only delicious but also packed with nutrients. Enjoy them as a mid-morning snack, a post-workout boost, or a sweet treat for your dessert cravings.
{{image_2}}
Mixing Wet Ingredients
The first step in crafting your Peanut Butter Crunch Bliss Bars begins with mixing the wet ingredients. This step is crucial for achieving a smooth consistency that will bind all the components together seamlessly. Start by combining creamy peanut butter, honey or maple syrup, and a touch of vanilla extract in a mixing bowl. To ensure optimal blending, consider warming the peanut butter slightly in the microwave for about 10-15 seconds. This will not only make it easier to mix but will also enhance the flavor profile of your bars. Stir the mixture until it is completely smooth and uniform, free of any lumps.
Incorporating Dry Ingredients
Once your wet ingredients are perfectly blended, it’s time to incorporate the dry ingredients. In a separate bowl, whisk together rolled oats, crispy rice cereal, and a pinch of salt. Adding a pinch of salt enhances the flavor of the bars, balancing the sweetness of the honey or maple syrup. Gradually fold the dry ingredients into the wet mixture, using a spatula or wooden spoon. The key here is to ensure even distribution; this will provide the perfect texture throughout the bars. Take your time with this step, as poorly mixed ingredients can lead to unevenly textured bars.
Preparing the Baking Pan
Now that your mixture is ready, it’s essential to prepare your baking pan for easy removal later. Line an 8×8-inch square baking pan with parchment paper, allowing some overhang on the sides. This will help you lift the bars out once they are set, preventing any sticking or breaking. If you don’t have parchment paper on hand, you can lightly grease the pan with a bit of coconut oil or non-stick spray to ensure easy removal.
Pressing the Mixture into the Pan
With the pan prepared, it’s time to press the mixture into the baking dish. Transfer the blended mixture into the lined pan and, using a spatula or your hands, press it firmly and evenly into the bottom. Achieving the right density is crucial; pressing down firmly will create a cohesive bar that doesn’t crumble when cut. Make sure that the mixture is spread evenly up to the edges of the pan for uniformity in each bar. A well-compressed mixture will also help the bars hold their shape once set.
Melting and Drizzling Chocolate
While the base of your Peanut Butter Crunch Bliss Bars sets, it’s time to melt the chocolate for drizzling. Use high-quality dark chocolate or semi-sweet chocolate chips for a rich flavor. Place the chocolate in a microwave-safe bowl and heat it in 20-second intervals, stirring in between until smooth and fully melted. Once melted, you can drizzle the chocolate over the pressed mixture in the pan. Use a fork or a piping bag for a more precise drizzle, creating a beautiful finish. Allow the chocolate to set slightly before chilling the entire pan in the refrigerator.
Chilling to Set
Chilling is a critical step that allows the bars to firm up and achieve their ideal texture. Place the baking pan in the refrigerator for at least 1-2 hours, or until the chocolate has hardened and the mixture has set. This refrigeration period not only helps the bars hold their shape but also enhances the flavors, allowing them to meld together beautifully.
Cutting and Serving
After the bars have chilled and set, it’s time to cut them into portions. Use the parchment paper overhang to lift the bars out of the pan and place them on a cutting board. For neat portions, use a sharp knife and wipe it clean between cuts. Aim for square or rectangular pieces based on your preference. These bars can be enjoyed right away or stored for later, making them a convenient snack option.
Nutritional Information
Each serving of Peanut Butter Crunch Bliss Bars is a powerhouse of nutrition. Typically, one bar contains approximately 150-200 calories, depending on the specific ingredients used. They are rich in protein, fiber, and healthy fats due to the peanut butter and oats, making them a satisfying snack that can help curb hunger.
Benefits of Ingredients
– Peanut Butter: Packed with protein and healthy fats, peanut butter is a heart-healthy choice that can help maintain energy levels.
– Oats: A great source of dietary fiber, oats promote digestive health and provide long-lasting energy.
– Dark Chocolate: Rich in antioxidants, dark chocolate can contribute to heart health and improve mood.
When compared to store-bought snack bars, these homemade bliss bars are typically lower in added sugars and free from artificial preservatives and fillers, making them a healthier option for snack time.
Versatility and Customization
One of the beauties of this recipe is its versatility. You can easily customize the Peanut Butter Crunch Bliss Bars to suit your preferences or dietary needs.
Suggestions for Ingredient Substitutions
– Nut Butters: Feel free to swap peanut butter for almond butter, cashew butter, or sunflower seed butter for a nut-free version.
– Sweeteners: If you prefer a lower glycemic index, consider using agave nectar or stevia as a sweetener alternative.
Ideas for Mix-Ins
You can also enhance the flavor and nutritional profile of your bars by adding mix-ins like:
– Chia seeds or flaxseeds for additional fiber and omega-3 fatty acids.
– Dried fruits such as cranberries, raisins, or apricots for a burst of natural sweetness.
– Spices like cinnamon or nutmeg for added warmth and flavor.
Serving Suggestions
These bars are delicious on their own, but they can also be paired with various accompaniments. Serve them with fresh fruit, such as apple slices or banana halves, for a balanced snack. They also pair wonderfully with Greek yogurt for a protein-rich breakfast or dessert.
Storage and Shelf Life
To keep your Peanut Butter Crunch Bliss Bars fresh, store them in an airtight container at room temperature for up to a week. If you want to extend their shelf life, consider refrigerating them, where they can last for up to two weeks. For even longer storage, you can freeze the bars. Simply wrap them individually in plastic wrap or foil, then place them in a freezer-safe bag. When you’re ready to enjoy, thaw them in the refrigerator or at room temperature.
Tips for Maintaining Freshness and Texture
When storing these bars, ensure they are completely cooled and set. This will help prevent them from becoming soggy or losing their crunch. If storing in the refrigerator, allow them to come to room temperature before serving for the best texture and flavor.
Conclusion
Making your own Peanut Butter Crunch Bliss Bars is not only simple but also a rewarding experience. With their delightful combination of flavors and textures, these bars offer a nutritious alternative to store-bought snacks. The ability to customize ingredients allows you to experiment with different flavors and create a snack that perfectly fits your taste.
I encourage you to get creative in the kitchen, trying out various ingredients and mix-ins to make these bliss bars your own. Whether you enjoy them as a post-workout snack, a midday pick-me-up, or a sweet treat, these homemade bars are sure to become a staple in your snack rotation. Embrace the joy of making delicious and nutritious snacks at home, and enjoy every bite of your Peanut Butter Crunch Bliss Bars!